Sure, you can find software dedicated to making mind maps. But if you already have PowerPoint, why not give it a try before shelling out cash for a separate application? We’ll show you how to easily create a mind map in Microsoft PowerPoint.
Create Your Mind Map in PowerPoint
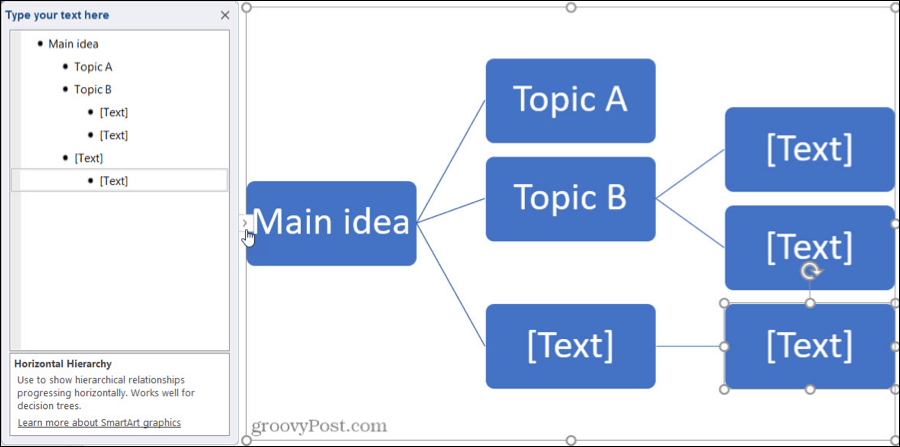
Open PowerPoint and create a new Blank Presentation. You can use a blank slide or one with a title box to name your mind map if you like. PowerPoint offers a great collection of shapes and connectors, but the SmartArt options are perfect. These premade diagrams give you a jumpstart. So click the Insert tab and choose SmartArt in the Illustrations section of the ribbon. You’ll see that the SmartArt layouts are also plentiful. For a mind map, you are building from a central idea which makes the hierarchy diagrams the best choices. We’ll pick the Horizontal Hierarchy option which lets us branch out to the side of our main topic with subtopics.
You can then enter your ideas directly in the mind map or using the SmartArt Text Pane.
To enter text into the diagram, select a shape, and then click inside to type. Since the mind map is your visual representation of thoughts, typing right into the shapes might be your best bet.To open the Text Pane, click the arrow on the left side of the diagram or the Text Pane button on the SmartArt Design tab. The advantage of the SmartArt text box is that you can also see your mind map as an outline and rearrange it easily.
If you can’t decide which way to enter your text, you can use both! You can keep the Text Pane open and type there or in the diagram. Either way, you’ll see your additions or changes immediately in both spots.
Add your project ideas, book chapters, content thoughts, or whatever pieces you need to include for your brainstorming. And remember to use the branching to connect smaller, subtopics like project tasks, story characters, and the like.
Add, Rearrange, and Remove Mind Map Elements
While the SmartArt diagrams give you an excellent start to your mind map, they likely don’t include as many elements as you’ll need. And you may want to rearrange shapes as you brainstorm.
Add Elements
You have a few ways to add more shapes to your mind map. So use which is more comfortable or convenient for you. Just make sure that you are on the SmartArt Design tab. When you add a shape related to another, the connector line will be automatically inserted as well.
To add a shape to the diagram, select a shape that relates to the one you want to add. Then click Add Shape from the ribbon and choose where to insert the shape. Alternatively, you can right-click the shape and choose one of those options from the Add Shape context menu.To add a shape in the Text Pane, hit your Enter key after the item you want the shape related to. The new shape will be added at the same level as the one you selected. You can then use the instructions below for moving it if needed.
Rearrange Elements
As you probably already guessed, you can use both actions in the diagram or the Text Pane to move shapes to different spots. Using these methods will move the connector line with the shape too.
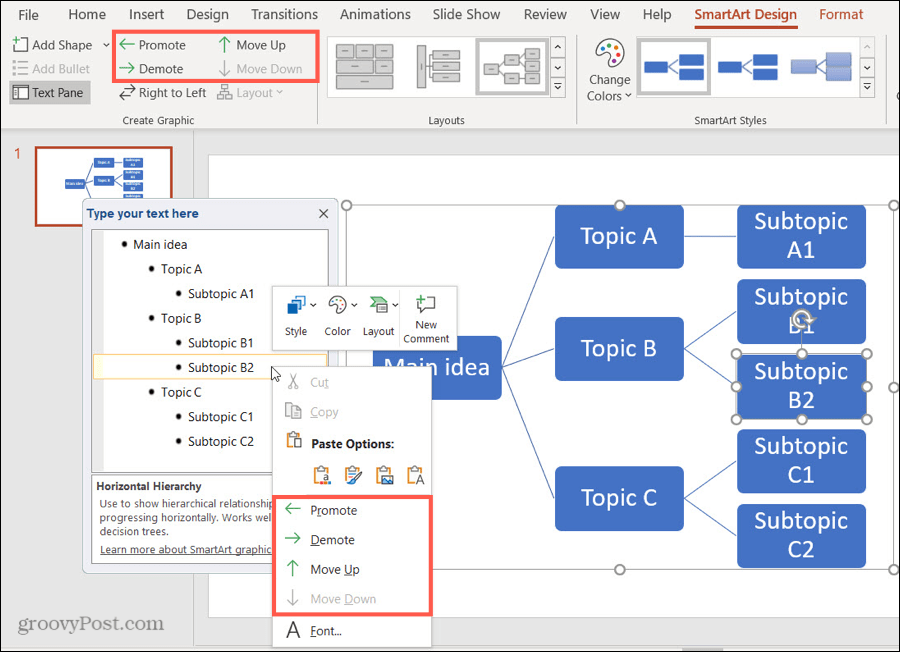
To move a shape directly on the diagram, just select, drag, and drop it where you want it. Or, select the shape and use the buttons in the Create Graphic section of the ribbon for Promote, Demote, Move Up, or Move Down.To move a shape using the text pane, right-click the item, and pick Promote, Demote, Move Up, or Move Down. On Mac, you have buttons for these actions at the top of the Text Pane.
Note that only actions applicable for that particular shape will be available.
Remove Elements
If you decide to delete a shape, this is easy to do, and removing a shape will remove the connector line with it.
To remove a shape on the diagram, select it and hit your Delete Be cautious that you are selecting only the shape and not the entire diagram. You can also right-click the shape and pick Cut.To remove a shape in the Text Pane, simply select the text for the item and use your Delete or Backspace key to remove it.
Style Your Mind Map in PowerPoint
If you plan to share or present your mind map or simply want to spruce things up a bit, PowerPoint gives you some nifty ways to change the appearance. You can style the entire mind map or just the individual shapes and text.
Style the Entire Mind Map
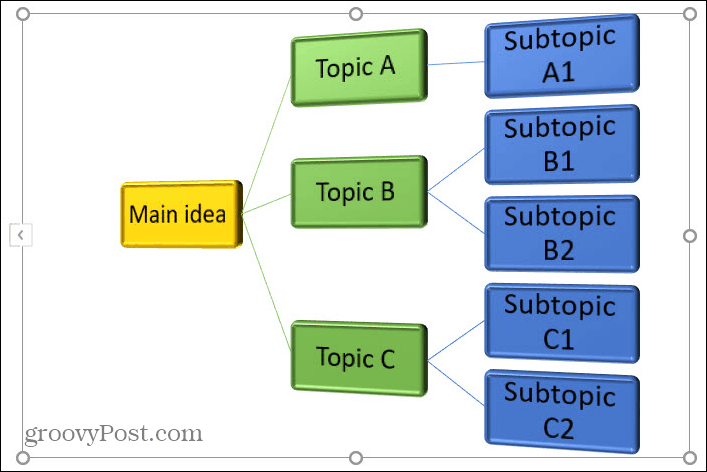
Make sure your mind map diagram is selected to display the SmartArt Design tab. Then in the SmartArt Styles section of the ribbon, you’ll see two handy tools. Change Colors: Click this button to give your mind map a different theme. You can pick from primary colors, colorful themes, and single color accents. SmartArt Styles: Click the arrow in this box to display available styles like 3D options. These vary depending on the exact SmartArt diagram you initially pick.
Style Individual Elements
Maybe you have particular shapes on your mind map that you’d like to format differently. For instance, you might want to make one stand out or swap out shapes for different ones. Make sure to select the shape in the mind map diagram to display the Format tab. You’ll then see an entire ribbon of options for formatting shapes and text in your mind map. Starting on the left, you can make your shape larger, smaller, or change it to a different one. You can use styles, fill colors, outlines, and effects for both the shape and the text. And of course, you can change its size or arrangement on the slide.
Build a Mind Map That Works Using PowerPoint
This is one of the easiest ways to create a mind map in PowerPoint. You can, of course, select a different SmartArt diagram or use the shapes and connectors to build one from scratch. But hopefully, this how-to gets you off to a great start for creating a mind map that works for you! If you like the idea of a mind map, but want to explore other applications, take a look at these online tools for diagrams and flowcharts or consider using Google Drawings.
![]()


