Note: This method applies to Windows 7 and the steps for Windows 10 will vary.
What is DNS?
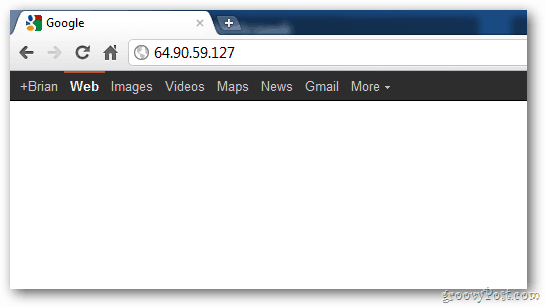
DNS translates IP addresses to an easy to remember domain name. For example, if you type: 64.90.59.127 into your browser address bar. It resolves to groovypost.com. Think of DNS as the Internet’s phone book.
Remembering a name like groovypost.com is much easier than remembering the IP address.
Configure DNS on Your Windows PC
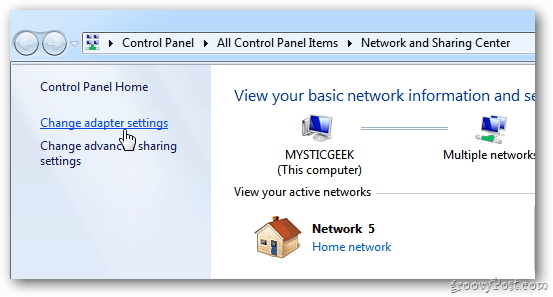
Google Public DNS provides a faster way to get to websites faster. To add Google Public DNS to your Windows 7 or Vista computer, click Start and type: networks and sharing center into the search box and hit Enter.
Next, click Change Adapter Settings.
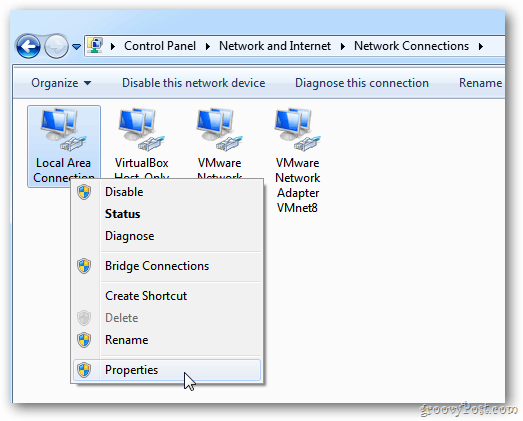
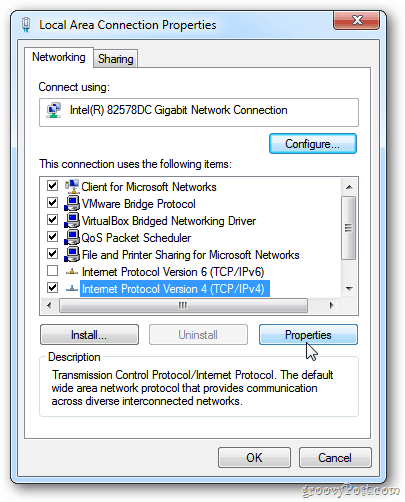
In the Network Connections screen, right-click Local Area Connection then Properties. Local Area Connection Properties comes up. Highlight Internet Protocol Version 4 (TCT/IPv4) then click Properties.
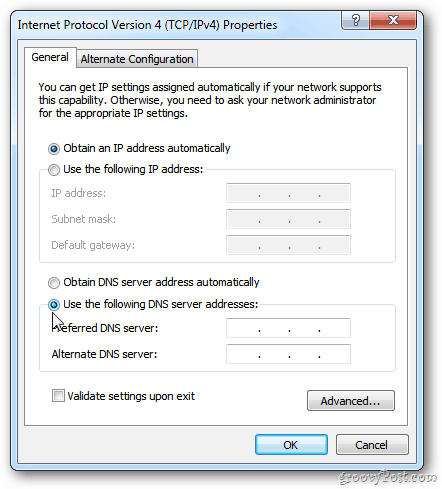
In the next screen, select Use the Following DNS Server Address.
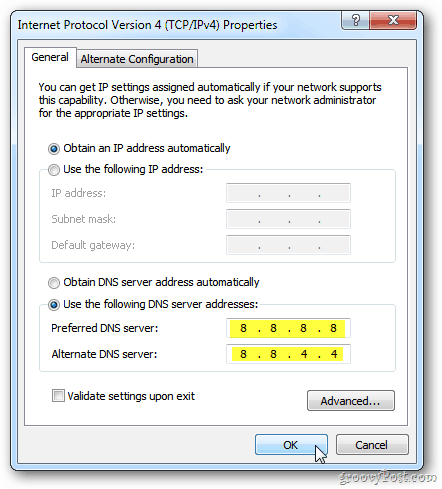
Type: 8.8.8.8 and 8.8.4.4 in the Preferred and Alternate DNS Server fields. They can be in either order. Click OK.
Closeout of the other open Network Configuration windows. Then launch your web browser and test out various busy sites to see if they load faster.
That’s it. There are other alternate DNS services like OpenDNS and DynDNS you can try too. I’ll be covering those in future articles. So far I’ve had great luck using Google Public DNS – especially while browsing in Chrome.
Other Alternative DNS Services
Here are the DNS settings for the three popular and free alternative DNS services out there:
Cloudflare DNS: 1.1.1.1 and 1.0.0.1OpenDNS: 208.67.222.222 and 208.67.220.220Google Public DNS: 8.8.8.8 and 8.8.4.4
Also pretty fast, and less evil than Google. 208.67.222.222 208.67.220.220 Do NOT use Google’s, use OpenDNS they even provide free malware filtering. 208.67.222.222 208.67.220.220 Comment Name * Email *
Δ Save my name and email and send me emails as new comments are made to this post.
![]()

