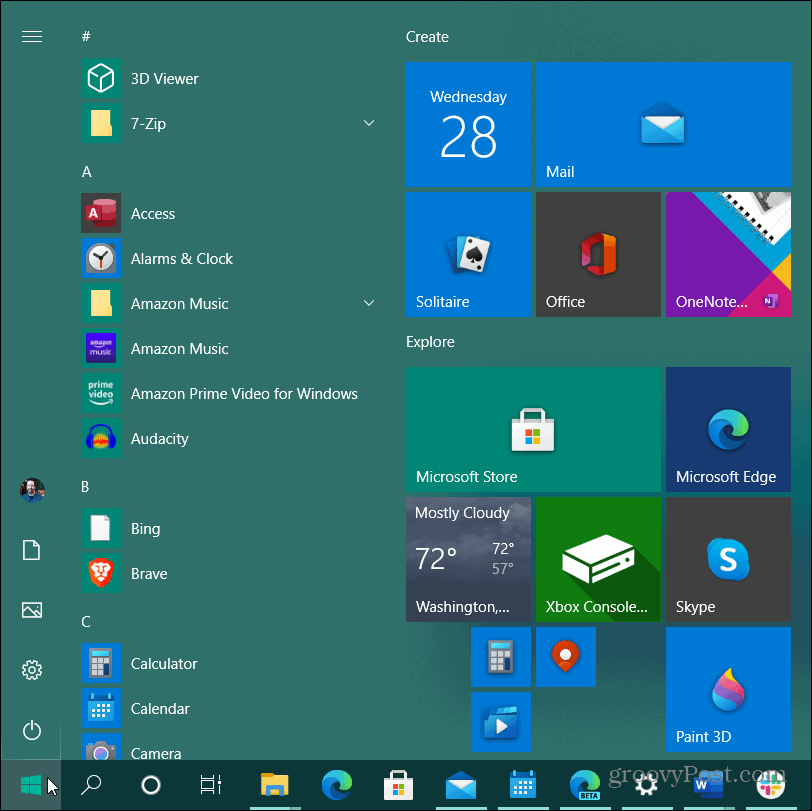
Choose a Custom Color for Windows 10 Start Menu
To get started open the Start menu by hitting the Windows key on your keyboard. Then select Settings (gear icon) from the left-hand side. Note that if you are a keyboard warrior you can also use the key combo Windows key + I.
When the Settings app opens up click on Personalization from the menu.
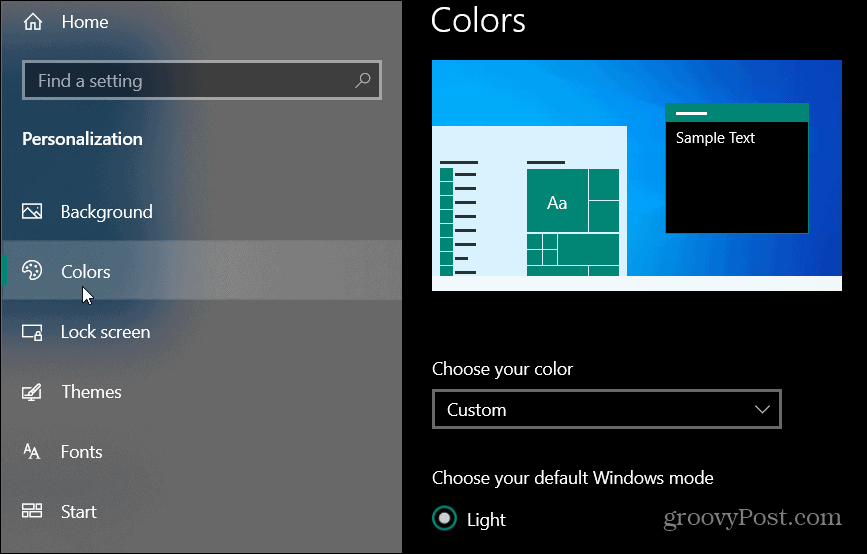
In the Personalization section click on Colors from the left-hand menu.
Next, from the Colors section choose Custom from the dropdown menu under “Choose your color.”
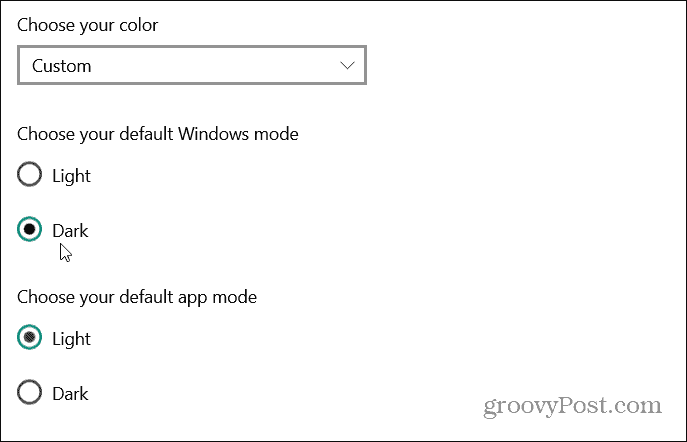
Under the “Choose your default Windows mode” pick either Light or Dark. Note that Dark mode is required for colorizing the Start menu. But since you picked a custom color scheme you can choose either light or dark here.
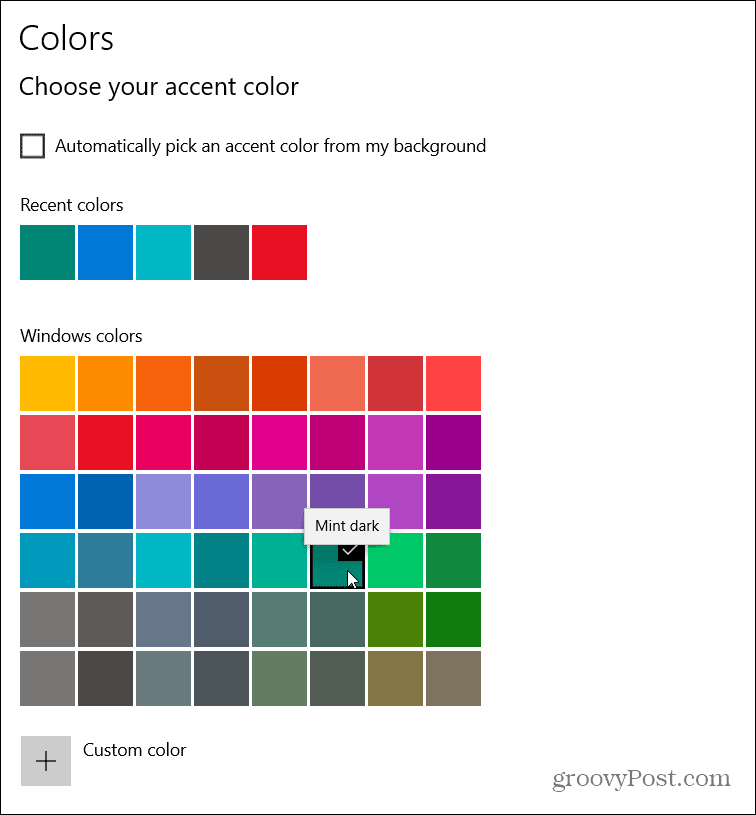
Next, scroll down to the “Choose your accent color” section. Here is where you will pick a color for the Start menu and more. If you want Windows to match your desktop background check the “Automatically pick an accent color from my background.” But you want something that’s more custom so under the “Windows colors” section check the color you want to use from the color grid.
You can customize the color even further by selecting the “Custom color” option.
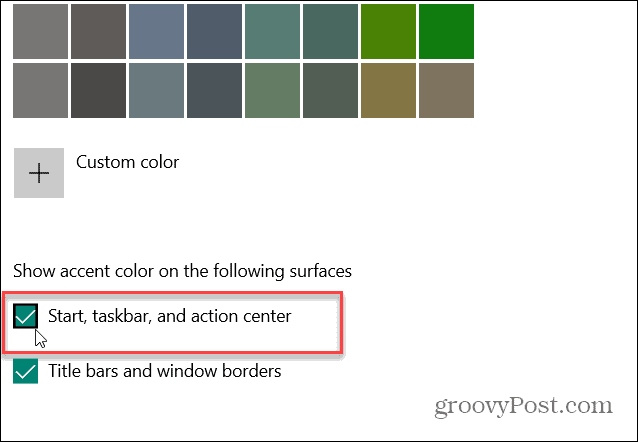
Now you have custom accent colors for your Windows, but you want to change the Start menu. To do that scroll down below the color grid and check the Start, taskbar, and action center box under the “Show accent color on the following surfaces” section.
Now the next time you launch the Start menu you will see the custom color you picked for it. Obviously, this is going to change the color or the Taskbar and Action Center, too.
If you want to change things back go back into Settings > Personalization > Colors and uncheck the “Start, taskbar, and action center” box. And if you want to change the theme back to the standard one choose “Light” under the “Choose your color” dropdown menu.
![]()
