Word 2010 Default Style Keyboard Shortcuts
If you don’t know already know the following Word 2010 style keyboard shortcuts, learn them. They’ll save you tons of time in the long run: These will let you whip through basic Word documents without touching your mouse.
Custom Style Keyboard Shortcuts in Word 2010
If you want to move beyond the default keyboard shortcuts for Normal and H1 through H3, you can set up your own custom style keyboard shortcuts. You can assign any style to a custom keyboard shortcut. Say, you could press ALT+Q to apply the “Quote” style or ALT+T to apply the “Title” style. Here’s how:
Step 1
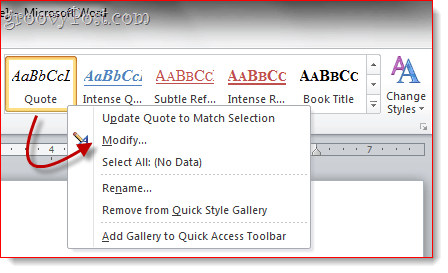
Right-click a style in the Style pane and choose Modify.
Step 2
Click Format and choose Shortcut key…
Step 3
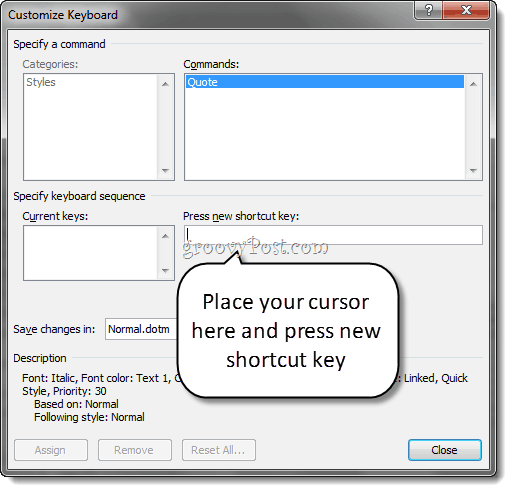
Place your cursor in the field that reads Press new shortcut key. Press the shortcut key on your keyboard that you’d like to assign to the selected style.
Step 4
Verify that the shortcut key that you just entered is unassigned to avoid conflicts. For example, you wouldn’t want to assign a shortcut key to CTRL+B, since that’s already being used by Bold.
Click Assign when you’re done.
Step 5
Lastly, make sure that “New documents based on this template” is selected in the Modify Style window. This will apply this custom style keyboard shortcut to all documents based on the normal template (or whichever template you’re using).
Step 6
Now, you can apply your custom style using your keyboard shortcut.
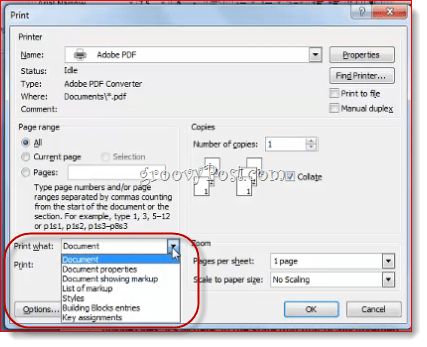
One last tip before we wrap this up: You can print off a handy reference sheet of all your keyboard shortcuts by going to File > Print and choosing Key Assignments in the settings section. If you don’t want to waste a sheet of paper, you can print it off to a PDF.
In Word 2007, you can access this feature via the Print What drop-down menu in the Print dialog.
Either way, it prints off a list of all of your custom shortcut keys for the current document.
Comment Name * Email *
Δ Save my name and email and send me emails as new comments are made to this post.


