And the company allows you to add your own customized gamerpic to be shown next to your Gamertag on Xbox Live. This means you can put up a picture you shot yourself, or an image you have saved to your local device. Here is a look at how to do it via the Xbox app on Windows 10.
Add Custom Gamerpic to Xbox Live via Windows 10 Xbox App
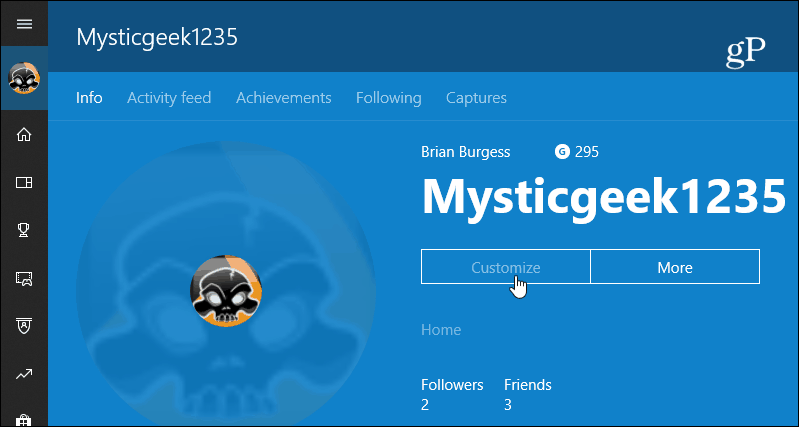
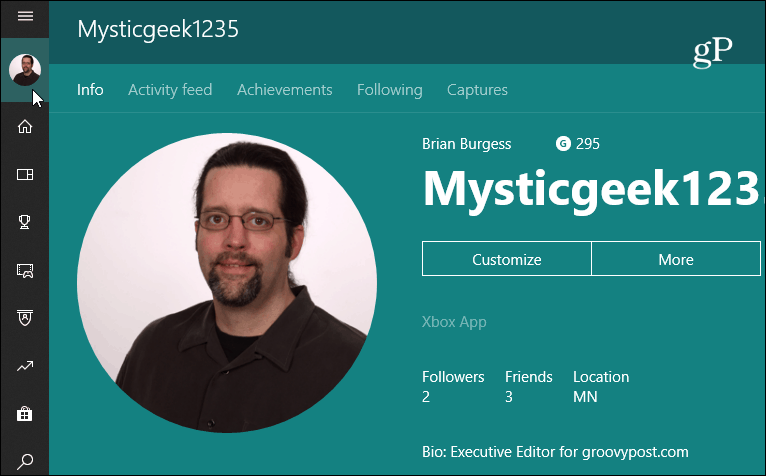
To get started, launch the Xbox app – now called “Xbox Console Companion” on your Windows 10 PC and click your Profile in the upper left corner. Then click the “Customize” button under your Gamertag.
Now you can click on your current gamerpic to change it.
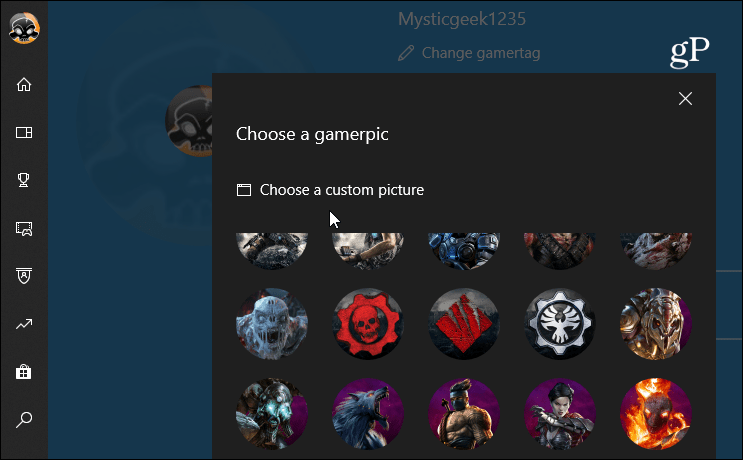
On the following screen, you can choose from the list of pre-made pics if you want. But since you want to create a custom one, click “Choose a custom picture” button.
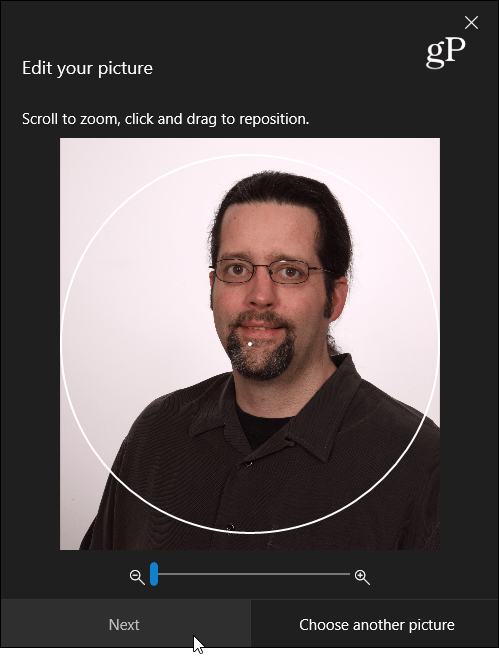
Navigate to the location of the picture you want to use and select it. That will pop it into a basic editor that allows you to zoom and reposition it. When you’re ready click Next.
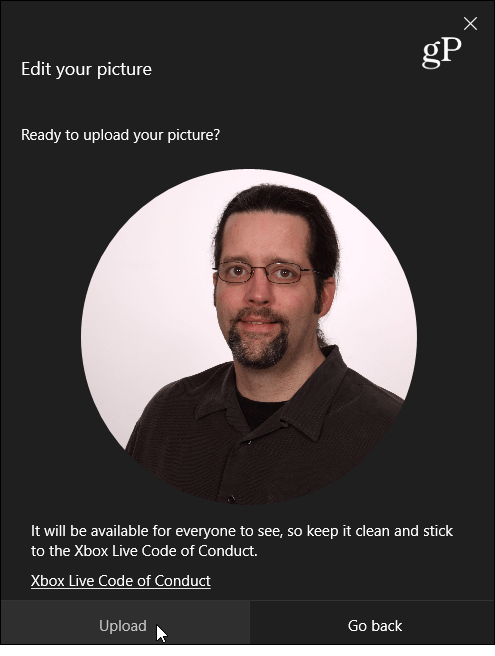
If you’re happy with the results, click the Upload button. Keep in mind that you may not see the new pic right away. Microsoft may need to approve it based on its Xbox Live community guidelines. If you keep it clean and respectful you should be just fine.
When it is ready, you will see your new custom gamer pic everywhere throughout your Xbox Live experience. Keep in mind this isn’t changing your Microsoft account picture. Just your Xbox gamerpic.
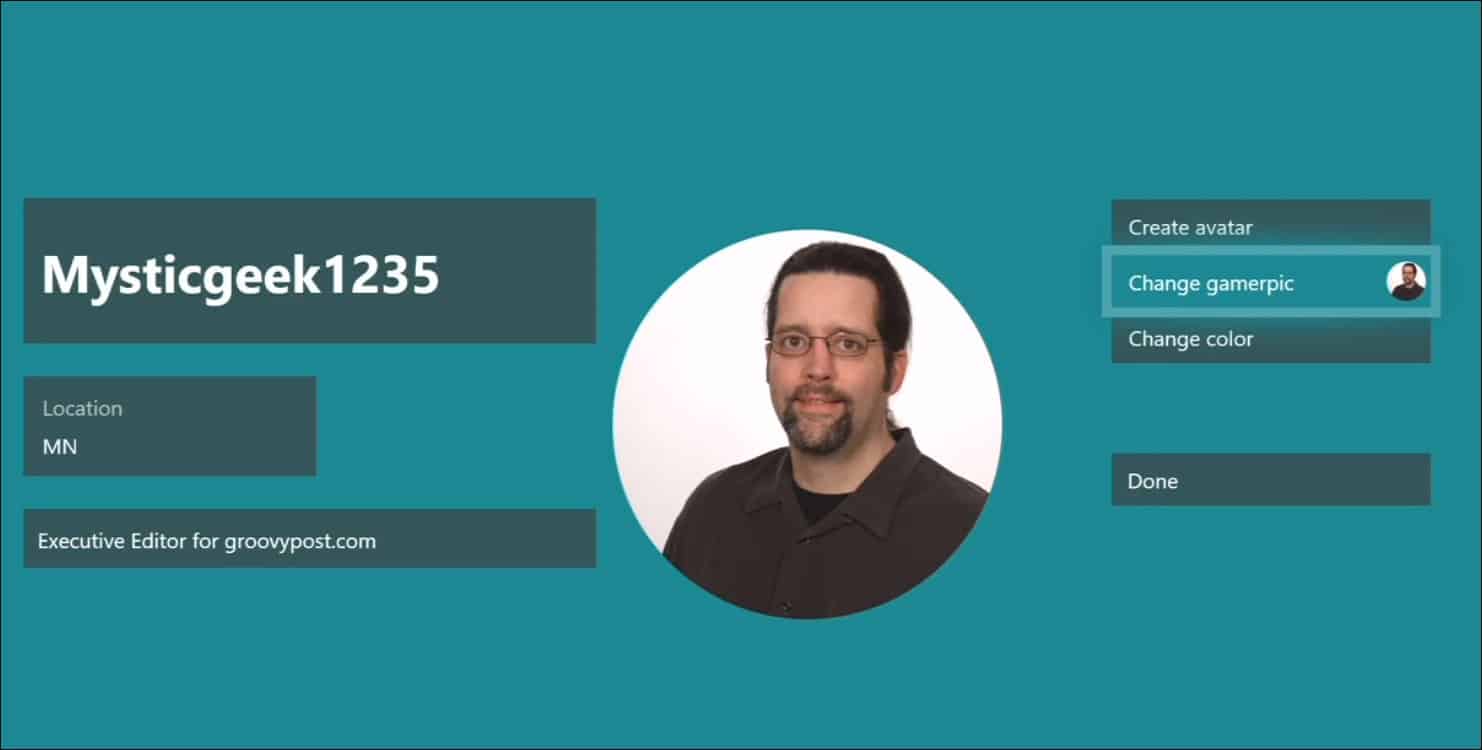
You can Add a Custom Gamerpic from the Console
It’s also worth noting that you can change add a custom gamerpic through the console, too. Just head to the “My Profile’ section from the menu. Then follow the same steps as you would in the app. But in the end, it’s probably easier to do this on your Windows 10 system.
There you go. Now you can use a permanent custom gamerpic or switch it to something else when you want. The editing features for your picture are limited, to say the least. So, if you need to edit and resize an image to be 1080 x 1080 you can use a free or paid software program.
![]()
