In this article, we’ll highlight a few fun examples of automating things you currently do manually, like shutting down your computer, sending emails, running reports every day or week, and more.
How to Set Up a Task Scheduler Automation
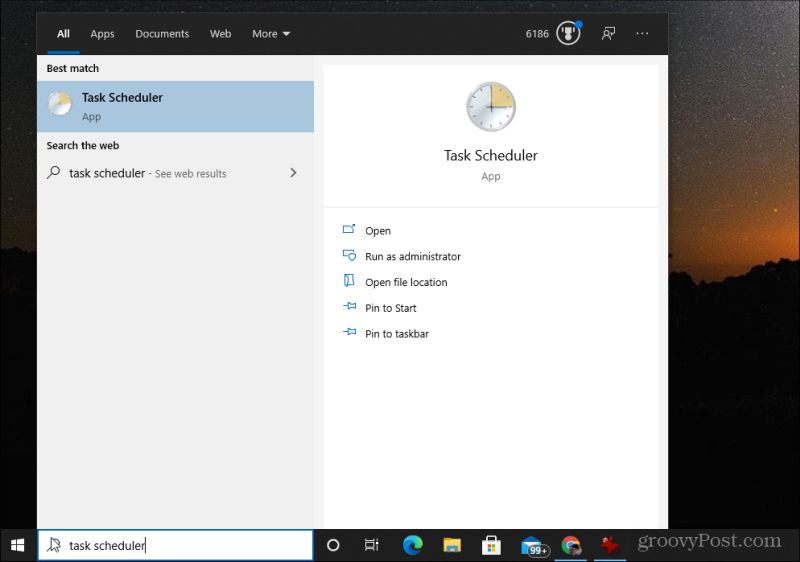
Before you can set up any automation with the Task Scheduler, you’ll need to know how it works. Let’s take a quick look at setting up tasks in Task Scheduler. Launch the Task Scheduler by selecting Start, typing “task scheduler,” and selecting the Task Scheduler app.
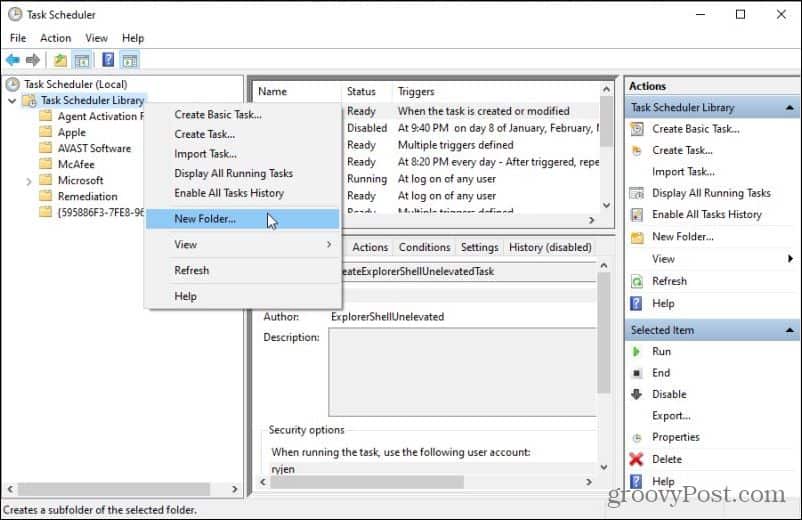
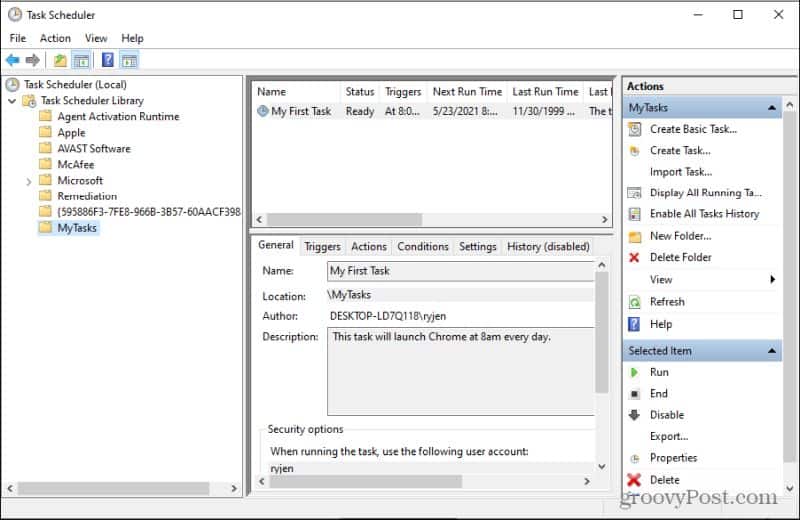
Once the Task Scheduler opens, it’s a good idea to create your own tasks folder to keep all your custom tasks organized. To do this, right-click Task Scheduler Library in the left pane and select New Folder.
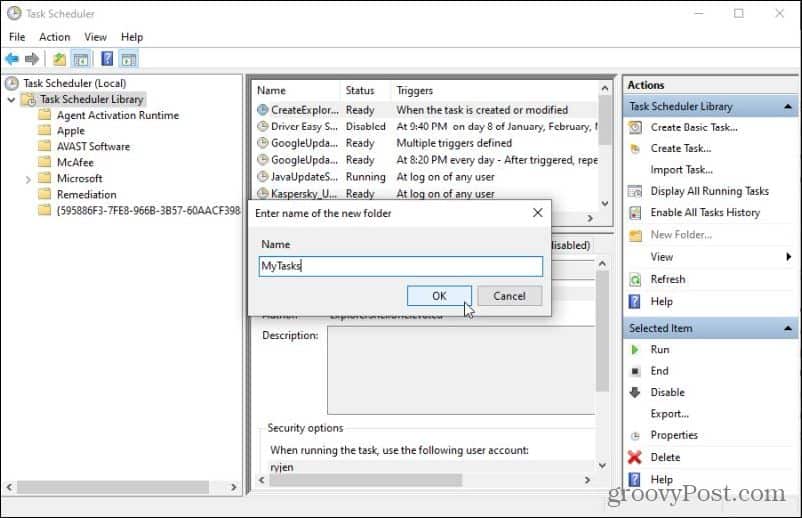
Name the folder something like “MyTasks” and select OK to finish.
Creating a New Task
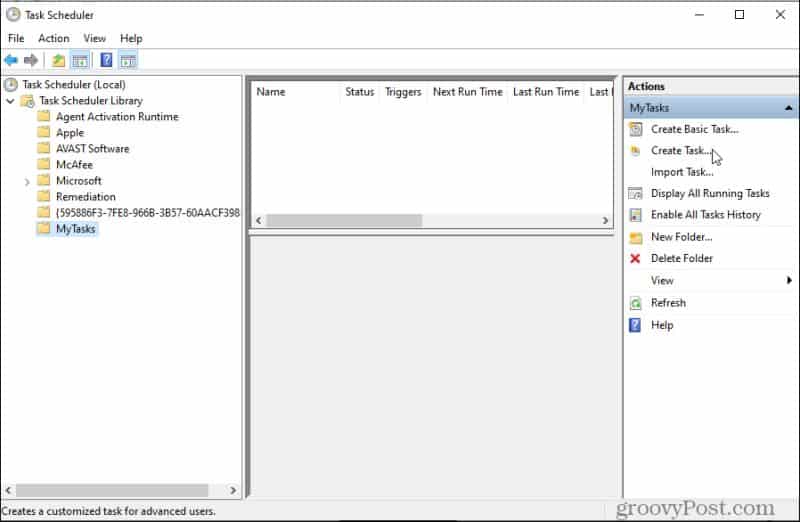
Select your new folder to add a new task. Whenever you want to create new automation in the Task Scheduler, select Create Task from the right Actions panel.
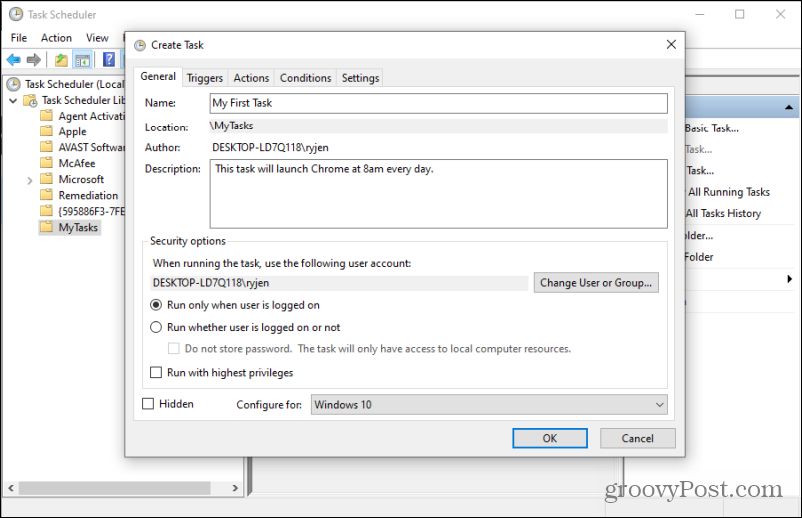
This will open the Create Task window, where you can configure everything you need to around the automated task. The General tab is where you’ll name the task and give it a description. You can also configure the task to run only when you’re logged onto the computer or whether you’re logged in or not.
Triggers and Actions
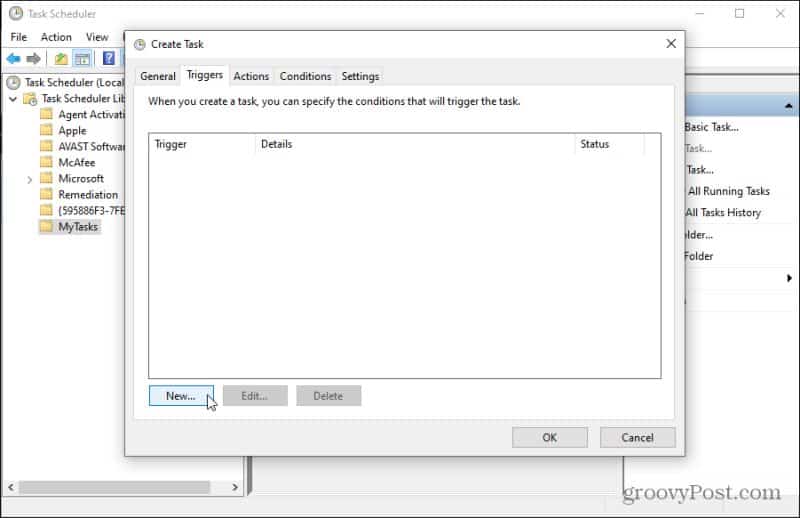
The Triggers tab is where you can configure when the task is going to launch. You can create multiple triggers for every task if you like. Select New to create a new trigger.
Options for creating a new task include:
On a schedule: At a regular time intervalAt log on: Whenever you log onto your computerAt startup: When the computer boots upOn idle: When the computer goes idleOn an event: Any Windows event occursAt task creation/modification: Whenever you create or modify a taskOn connection to user session: Logging into an account sessionOn disconnect from user session: Logging out of an account sessionOn workstation lock: Whenever your system locksOn workstation unlock: Whenever you unlock your computer
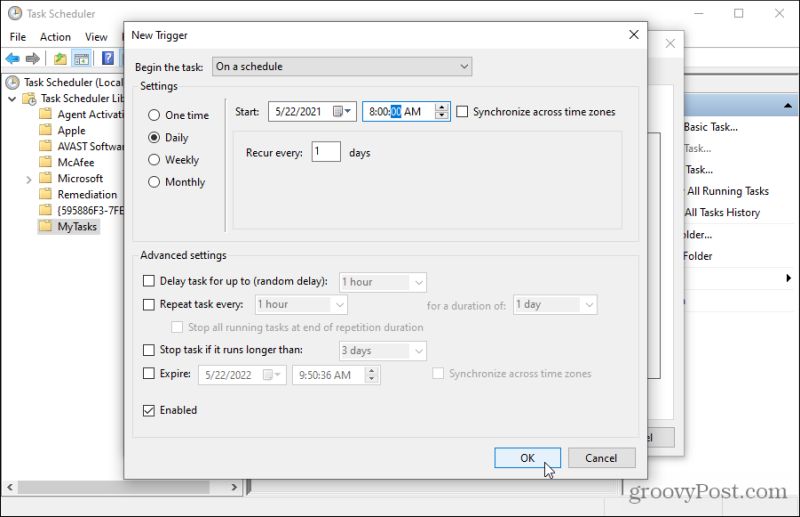
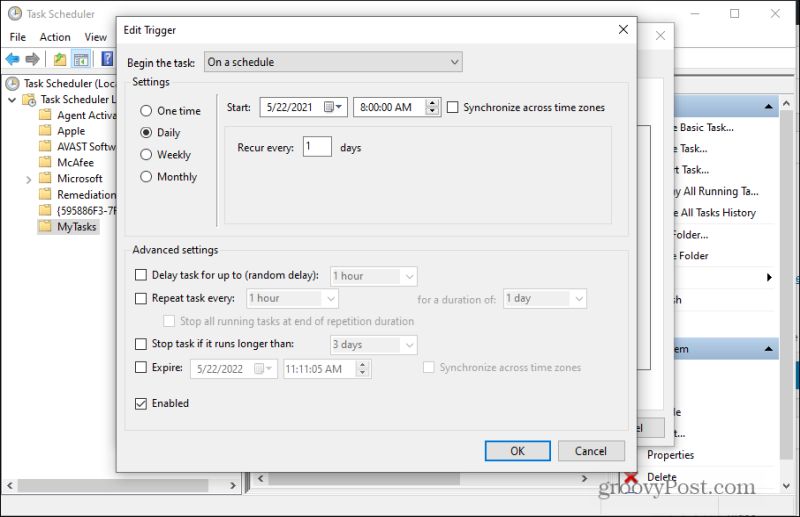
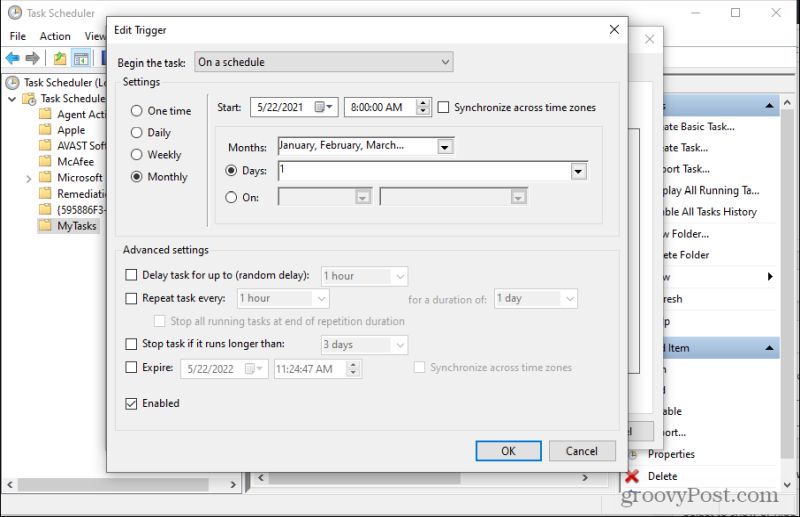
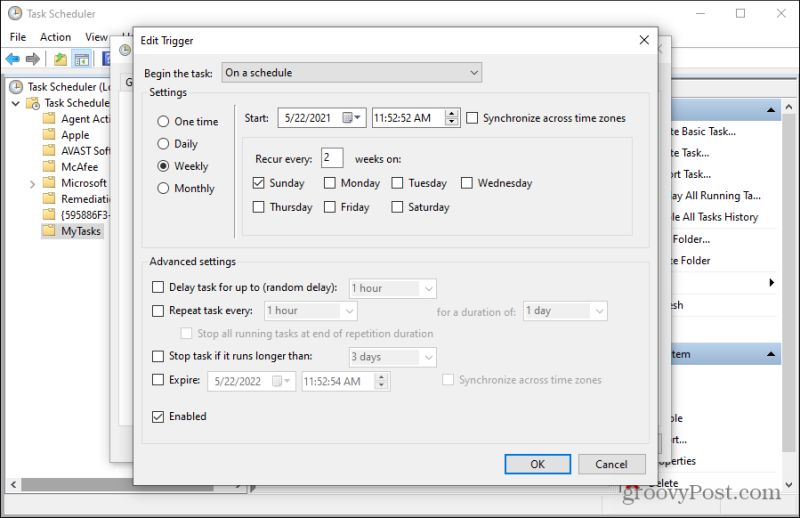
The most common selection here is On a schedule. You can trigger your task to run daily, weekly, or monthly. It’s also possible to delay a task, repeat it regularly after triggering, stop the task if it takes too long to run, and set the task to expire (and not trigger anymore) after a specific day and time.
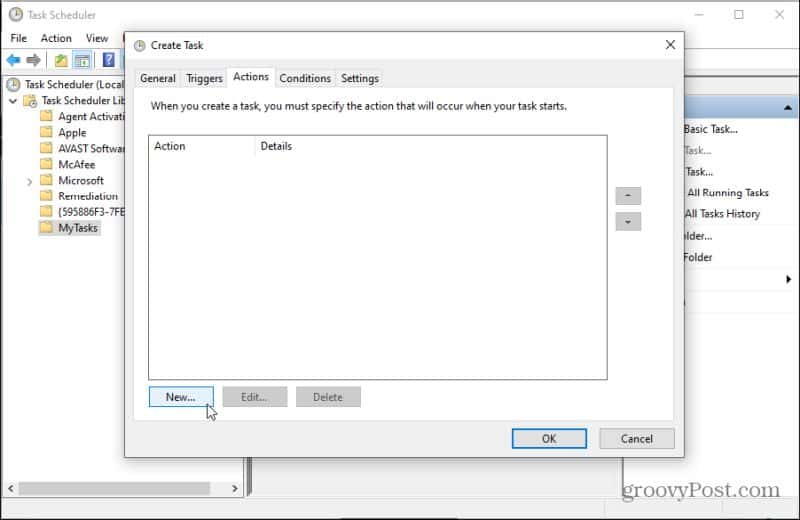
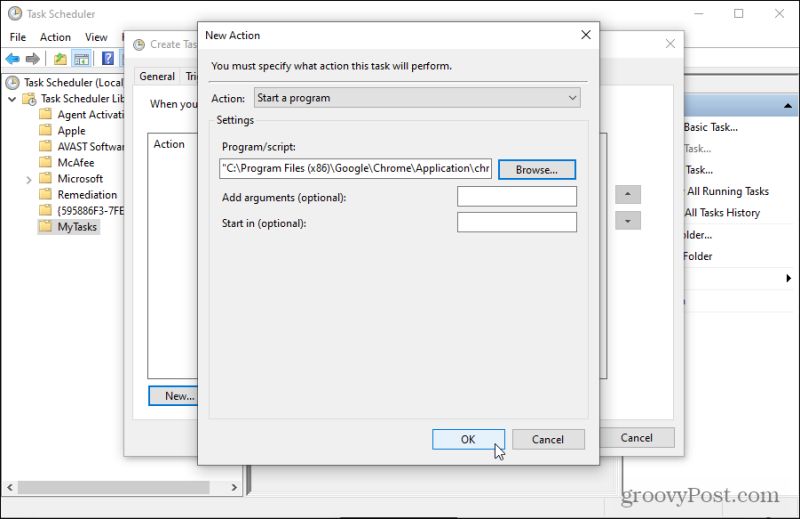
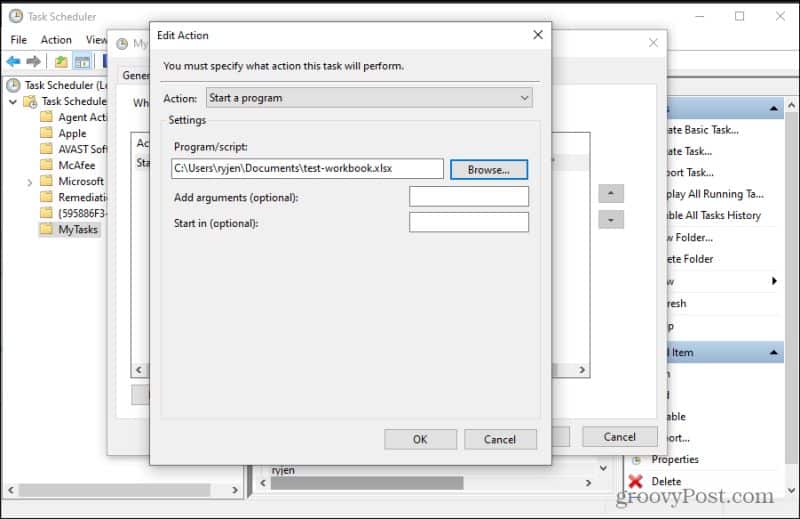
The Actions tab is where you can configure what happens when the task is triggered. You can create multiple actions for every task if you like. Select New to create a new action.
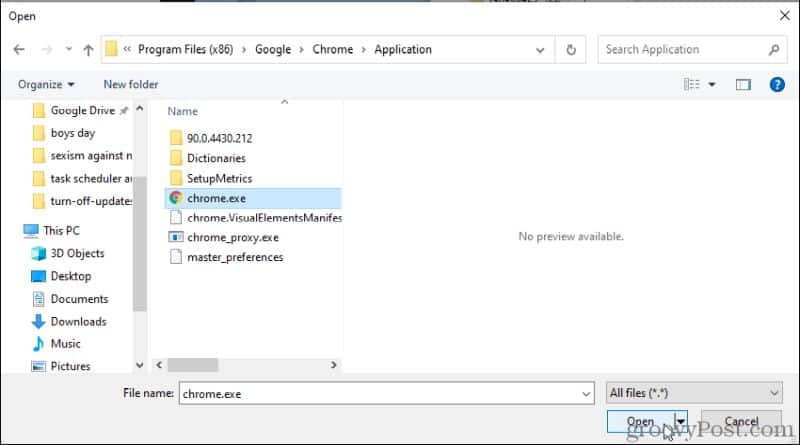
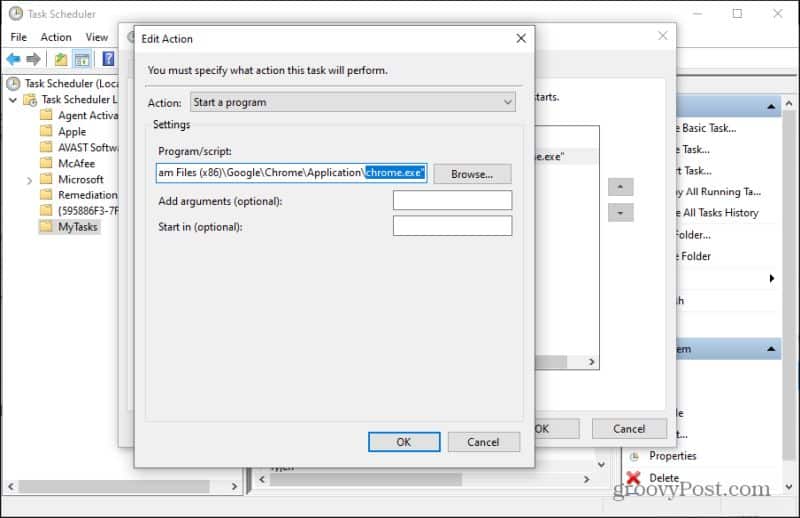
Select the Browse button to choose the app you want to launch when the task is triggered. You’ll need to browse your computer to the executable or batch file that you want to launch.
Once selected, you’ll see the path in the Program/script field. You can optionally add extra arguments to the end of the launch command. You can specify what folder to use when launched (useful if there are INI or log files in that directory that the program needs to access).
Conditions and Settings
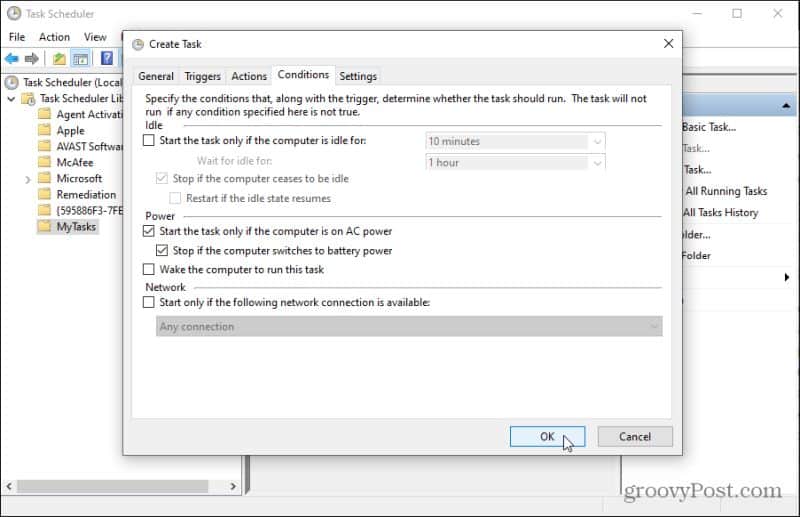
The Conditions tab is where you can customize conditions around the task. Options here include:
Only running the task if the computer has been idle for a certain period of timeStopping the task if the computer is no longer idleOnly launching the task if the computer is plugged in (not running on battery power)Forcing the computer to wake to run the taskOnly running the task if the computer is connected to a specific network
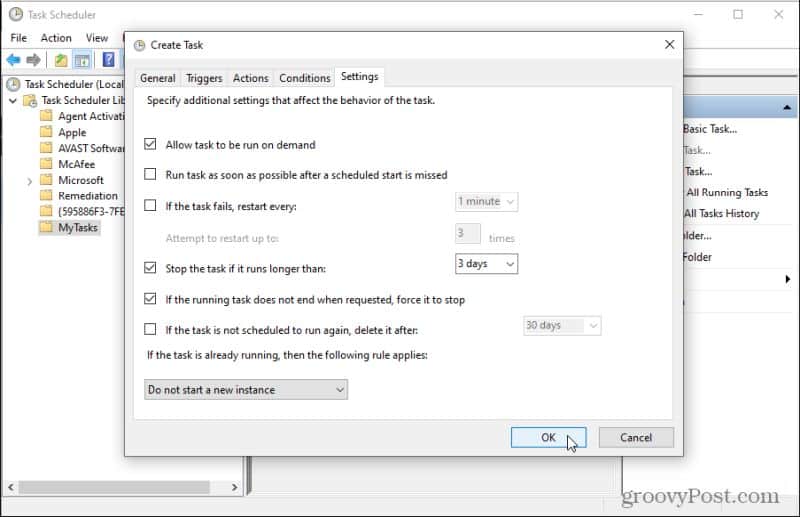
Once you’ve configured the task the way you like, select OK to commit those changes. The Settings tab is where you further customize how the task behaves. Options here include:
Allowing users to trigger the task manually (on demand)If the task fails to start on the trigger, allow it to start as soon as it canConfigure how often to try a restart if the first trigger failsStop the task if it has run longer than a certain time periodIf the task doesn’t stop when required, force it to stopIf the task isn’t scheduled to run anymore, automatically delete itPrevent the task from relaunching if it’s already running (this will avoid errors)
Once you’ve configured the task the way you like, select OK to commit those changes. Once you’re done setting up your task, you’ll see it appear as a new task inside your custom “MyTasks” folder.
Now that you know how to set up a scheduled task let’s look at a few creative ideas.
Ideas for Task Scheduler Automations
So what’s the Task Scheduler actually good for? Let’s run through 6 creative ideas for using the Task Scheduler.
1. Launch Chrome at 8 am Every Morning
If you typically leave your computer running all day and would like Chrome to launch and be ready for you first thing in the morning, launching it at the same time every day will save you some time. Just set your task trigger to On a schedule set to Daily and the time set to 8:00:00 AM.
Set the task action to Start a program and browse to the chrome.exe executable on your computer.
2. Automatically Send a Report Monthly to Your Boss
While there isn’t an easy way to send an email via scripting, you can set up an Excel VBA script that’ll run through calculations and send your boss an email. You can create something similar in Excel using a macro you set up to run automatically when the Excel file is launched. However, you set it up, save the file somewhere you’ll remember. Then in Task Scheduler, set your task trigger to On a schedule set to Monthly and the time set to the time you want the report sent.
Then set the Action to Start a program, select Browse, and navigate to the path of the macro-enabled Excel file you’ve created.
The report Excel file will run on the first of every month, and the automated macro will email the report to your boss!
3. Reboot Your Computer Once Every Day
If you keep your computer running nonstop every day, it’s a good idea to perform a reboot to clear out log files, cache, and other system areas that can get cluttered and lead to issues. To automate rebooting, just set up a task with a daily trigger like in the Chrome example above, and then create a BAT file using Notepad with the following command: shutdown -s -t 01 Save this BAT file in a folder and then set the Action of your task to launch that BAT file at that path. You can also use this same approach to wake or put your PC to sleep as well automatically.
4. Scan Your PC Every Other Week
Corrupt system files can lead to serious issues and often even a blue screen of death. If you run a system scan (using the SFC command), if it finds a corrupt file, it’ll automatically restore it with the authentic Windows system file. Configure the Trigger to run every other week.
Again, create a BAT file with the following command: sfc /scannow Save this in a folder and then set the Action of your task to launch that BAT file at the path where you saved it.
5. Refresh Your Internet Connection Daily
Another useful automation to run every so often is clearing out your internet connection. Clearing the DNS cache and renewing the IP address can fix several internet slowness and connection problems. Repeating this automatically every day will prevent issues from happening eventually, especially if you keep your system running all the time. To create this automation with Task Manager, create a BAT file using Notepad and add the following lines. ipconfig/release TIMEOUT 20 /nobreak ipconfig/renew TIMEOUT 20 /nobreak ipconfig/flushdns Save the file with a name like refreshinternet.bat into a directory that you’ll remember. Please create a new task using Task Scheduler to run simultaneously every day, and set the Action of your task to launch that BAT file at the path where you saved it.
6. Log Performance Monitor Statistics
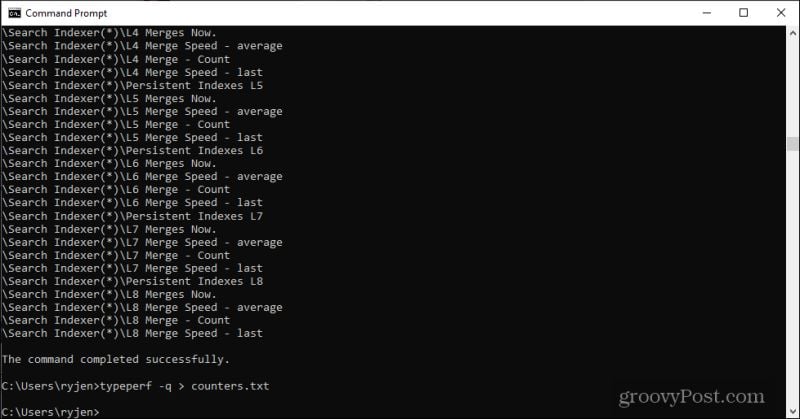
If you notice there’s a time of day when your computer seems to slow down, useful automation is to trigger logging Performance Monitor statistics (performance counters) every day at that time. In fact, logging them every time your PC goes idle will show you how hard your computer is working when you’re not using it. This can be useful to know if processes or programs run on your computer that you don’t know about and might be chewing up system resources. To do this, first, use the Performance Monitor to create a log file called counters.txt that includes the performance counters you want to log. Open the Command Prompt and type the following command: typeperf -q > counters.txt This will output all of the performance counters currently set up in the Performance Monitor to a file named counters.txt.
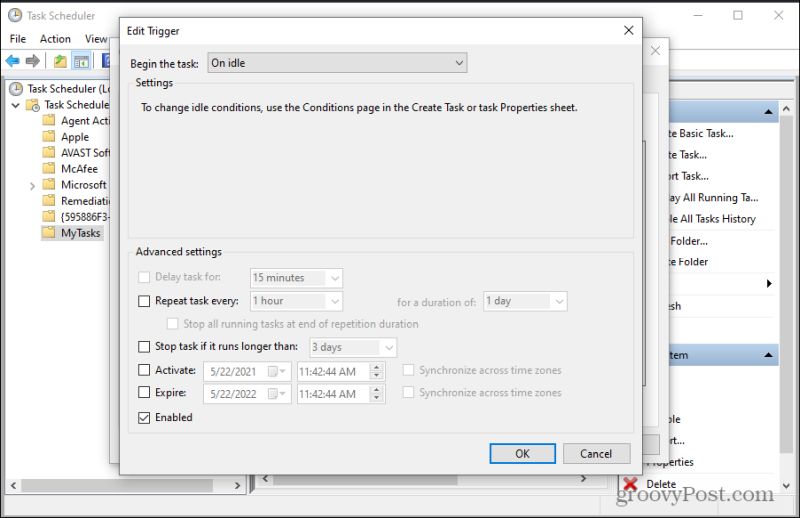
Next, follow the same procedure as the BAT file-related tips above. But this time, when you create the BAT file, paste the following line. typeperf -cf counters.txt -si 5 -sc 50 -f TSV -o countervalues.tsv Save this BAT file in a folder that’s easy to remember, like c:\counterlog\ and also place the counters.txt file you created in the same folder. When this BAT file runs, it’ll output the values of all counters listed in the counters.txt file to a tab-delimited file called countervalues.tsv in the same folder. Configure the Trigger for this task to begin On idle.
Set the Action of your task to launch that BAT file at the path where you saved it. Now, whenever the computer goes idle, your BAT file will run and log the values of all of those counters to the output tab-delimited file.
Using Task Scheduler for Automation
As you can see, the Task Scheduler can be a lot more useful than you probably imagined. Best of all, it’s a utility that comes with any Windows 10 PC and doesn’t require anything to download or install. Think of all of the commands available to run on your Windows 10 PC and what you could do if you run them automatically. Start using the Task Scheduler and reduce the number of things you have to remember or things you need to do to maintain your PC properly. Comment Name * Email *
Δ Save my name and email and send me emails as new comments are made to this post.
![]()

